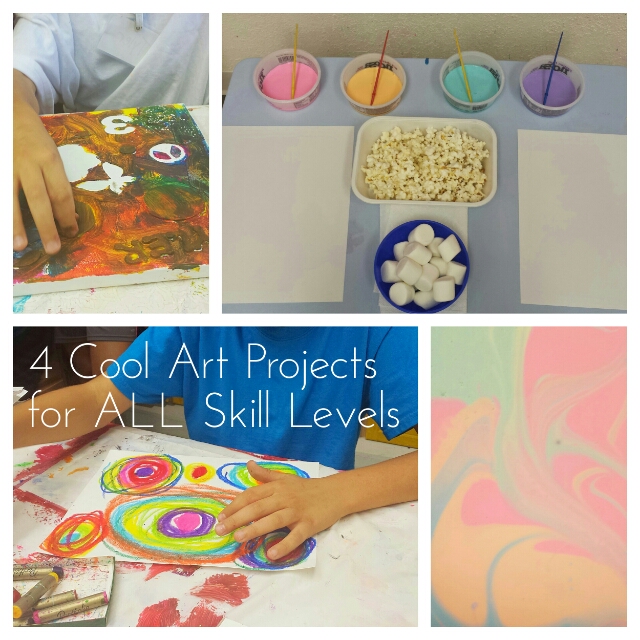
Once a week, I work at the Social Mind Center where I teach several classes of Messy Art. The challenge is to find art projects for children with very different skill sets. The following activities were a great success with children at our center. I hope you enjoy and send me feedback and pictures!!!!
1- Snack Painting
Who doesn’t love snacks?! For very young children that put everything in their mouths, I like to use edible paints but trust me, the appeal was just as great for older children. Just make sure to check with parents regarding food allergies and restrictions. Depending on the ingredients you choose, this activity can have lots of SUGAR!!!!
You Will Need:
- White card stock paper
- Condensed milk (For children that are Gluten Free use heavy cream)
- Several colors of Food Coloring
- Popcorn
- Marshmallows (For children that are Gluten Free leave this ingredient out)
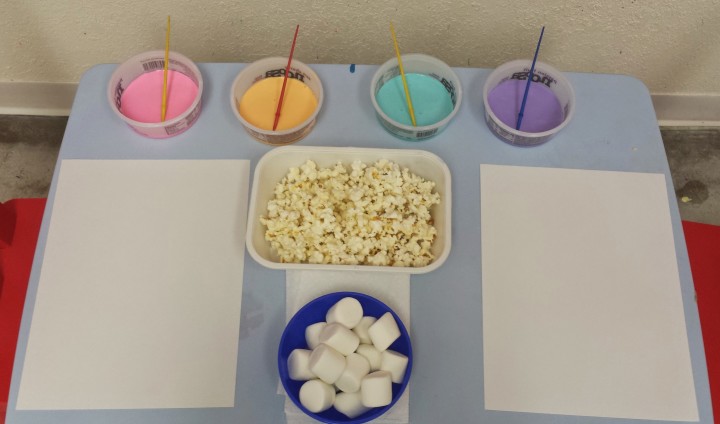
The Activity:
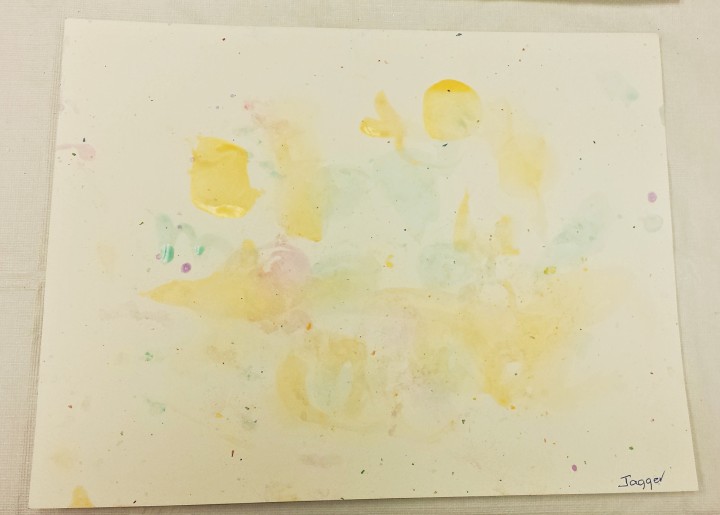
This is as simple as it gets. Mix a few drops of food coloring with condensed milk. Set out bowls of popcorn and marshmallows as well as white card stock paper and let the fun begin!
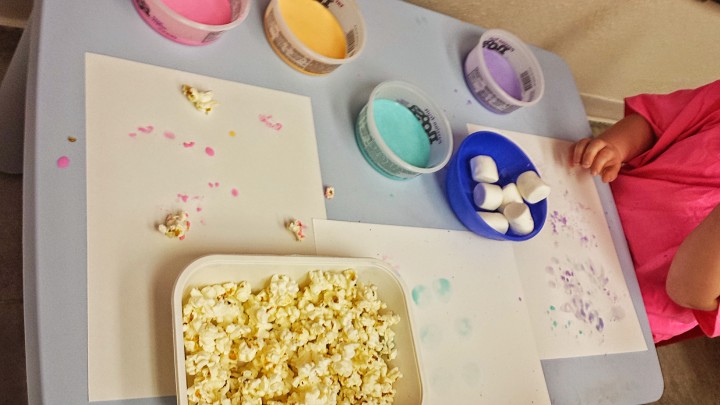
Children dip snacks into the “paint” and stamp it on their paper…watch the snacks disappear in no time!
Therapy Corner:
I love crafts that involve food. Many children (and especially those with ASD and SPD) are picky eaters. Using food and art is a great way to expose them to food that they would otherwise never even touch! This is a first step in the right direction.
2- Oil Pastels with a Twist
A new twist on a regular coloring activity!
You Will Need:
- White Cardstock paper
- Oil Pastels
- 1/3 cup of baby oil (or any cooking oil will do)
- 5-6 Cotton balls
The Activity:
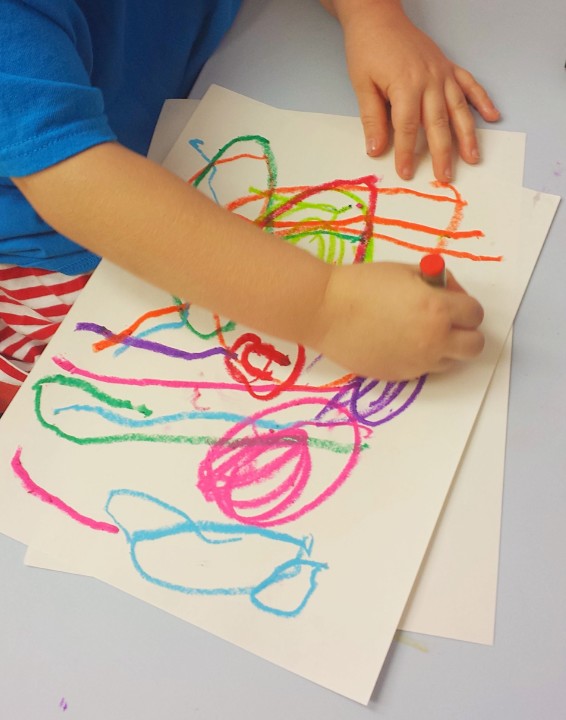
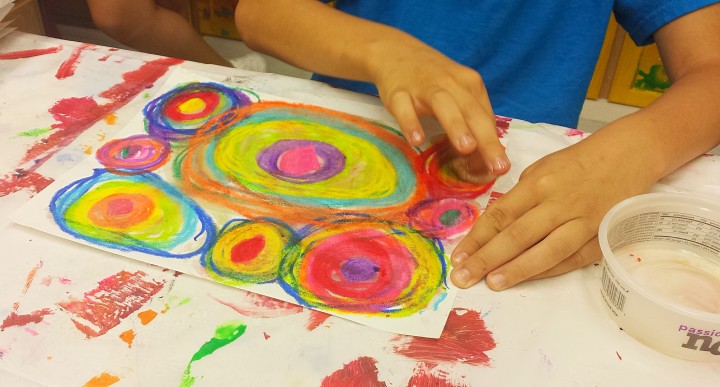
Place a tray or cover the working surface with plastic such as a garbage bag! Ask children to use oil pastels to draw a colorful picture. For this class I had them draw Kandinsky Circles.
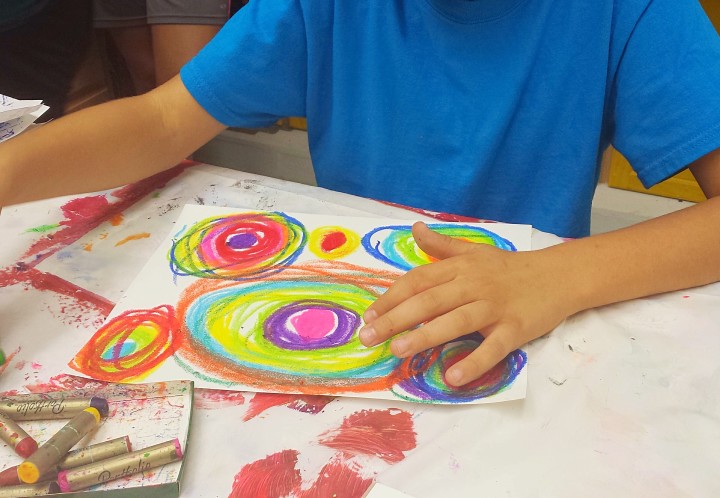
For some, this was difficult so they drew colorful flowers. The important thing is to have a variety of colors.
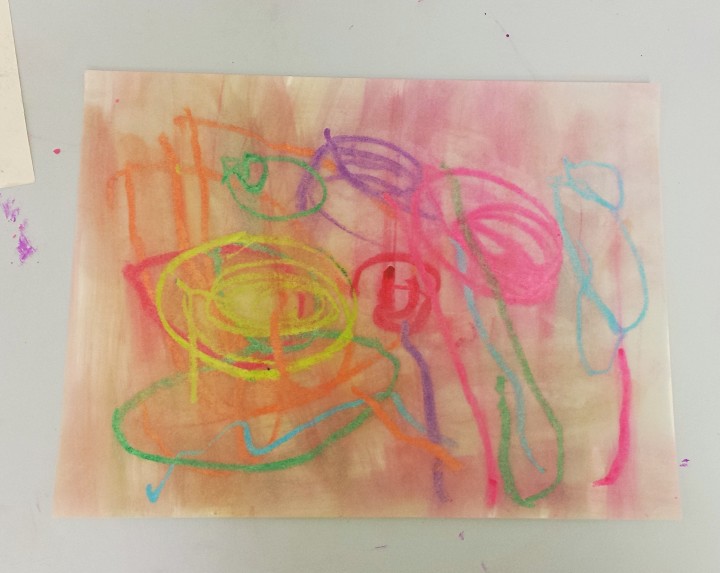
Once the drawing is complete, children dip a cotton ball into a little bit of oil and spread it in ONE direction across the drawing.
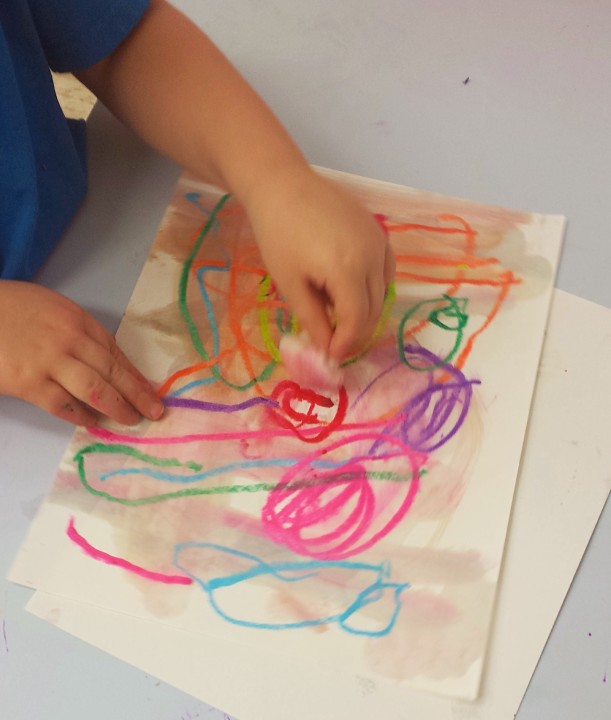
This will spread the colors and create a cool effect! Let it dry completely.
Therapy Corner:
This activity is simple yet for children with tactile sensitivities, it can be quite challenging. It gets dirty, oily and slippery!
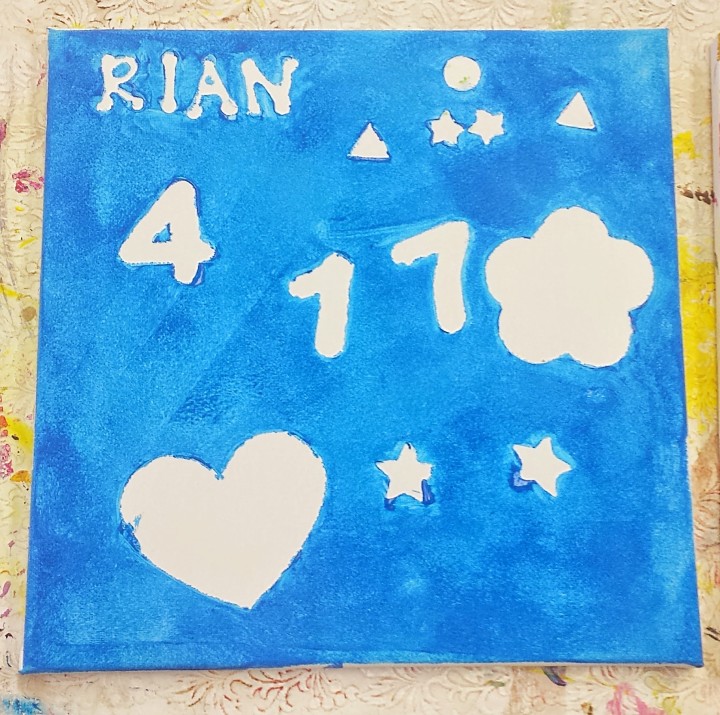
3- Sticker Art
Here’s a really great way to create a beautiful project with minimal skills needed. I like to use this activity for holiday gifts.
You Will Need:
- Small Canvas
- Variety of Foam Stickers
- Acrylic/Tempra Paint
- Sponge brushes and regular paint brushes
- Blow Dryer/Fan (if you want the painting to be ready that same day)
The Activity:
Ask children to peel and stick stickers on their canvas. You can have them create a theme ex: Ocean Animals or provide them with letters to create a message to mom for Mother’s Day or create their name for a cool painting they can hang in their rooms!
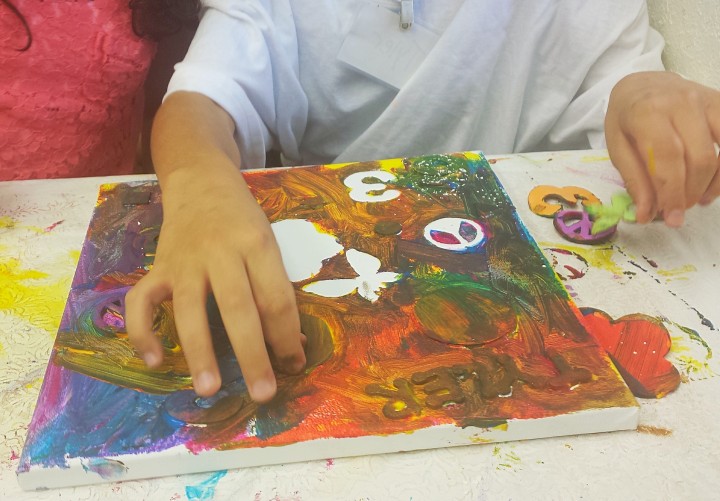
Use a sponge brush and different colored paints to paint over the entire surface of the canvas (Paint over the stickers too, you may need a little paintbrush to get into the crevices of the stickers). Blow dry the painting on cold setting just enough so the stickers can be peeled off without leaving streaks. Tada! Beautiful Art!
Therapy Corner:
Peeling stickers is a great way to work on neat pincer grasp i.e. thumb and index finger working to peel the stickers. This is an important precursor to an efficient pencil grasp and to improve dexterity.
4- Rainbow Oobleck Art!
Ready to get dirty?!! This is a fun twist on oobleck. This really gets messy so get ready for it!
You will Need:
- White Cardstock paper
- 2 cups of corn starch
- 1 cup of water
- 1-2 drops of food coloring
- Large bin
The Activity:
I created several bowls of different colored oobleck. The ingredients are quite simple but you will find it difficult to mix. Just be patient. You may start out with a wooden spoon but eventually you will need to mix it with your hands.
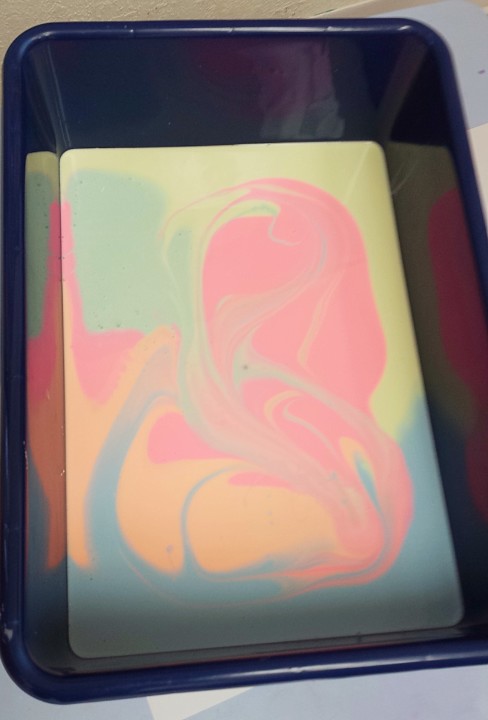
Note: I prepared this activity 30 minutes before my kiddos showed up, the oobleck hardens and looks like wet cement! All you have to do is mix it up once again and it liquefies!!!!
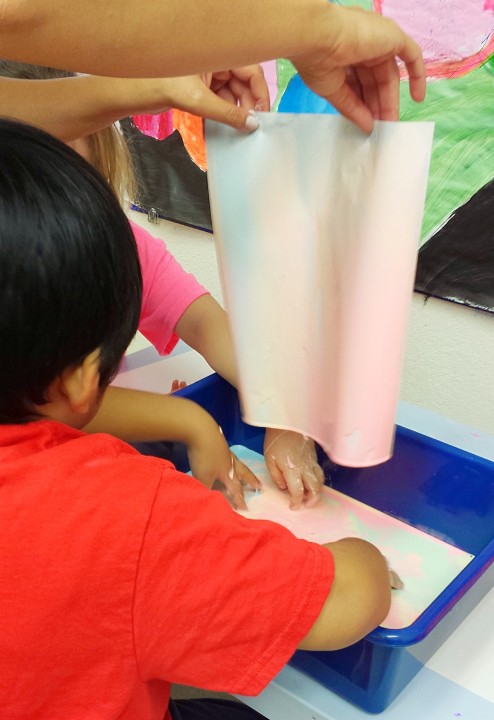
In a large bin I had each child pour in one of the colored ooblecks. We gently swirled it with a spoon to create a cool pattern and each child had a chance to dip in a sheet of paper to reveal a beautiful rainbow creation! I did not send this project home! Instead, we took pictures of these beautiful masterpieces.
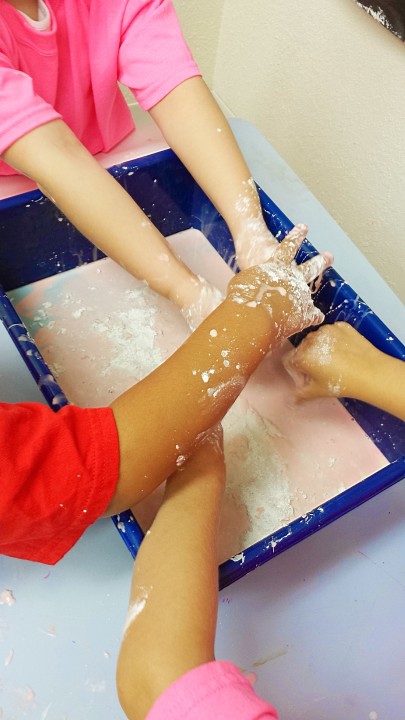
It was then time to have some fun with this fascinating medium! The kids looooved it!
Therapy Corner:
Oobleck is quite a challenging medium to play with. For those of you who never felt it before, it’s a liquid that solidifies and then returns to a liquid consistency when mixed. It almost feels like wet chalk! For children with tactile sensitivities, this is quite the challenge. There are so many different sensations when using this medium. It feels wet but also can feel hard and chalky and if it dries on the hands it then feels powdery! Pretty cool!