

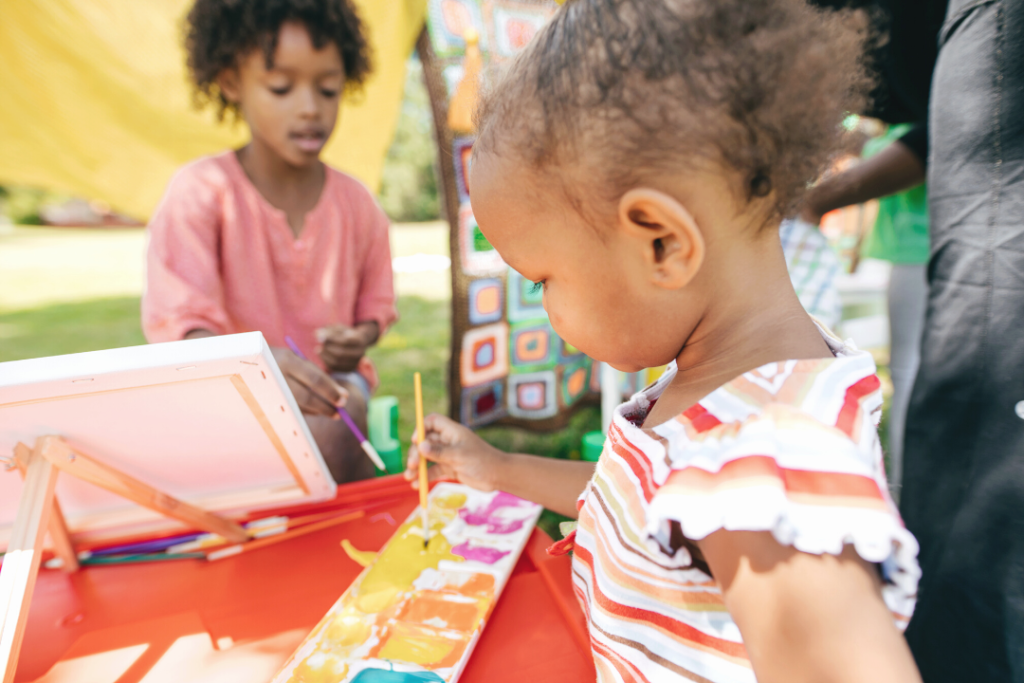
Miss Mancy Summer classes at the Social Mind Center have been doing great! The kids are really enjoying everything they are getting their hands on! I wanted to share with you some of the most popular Art projects we did. I like that they can accommodate various skill levels.
1. Cool Self-portraits!
You Will Need:
- Large white paper
- Pencil and eraser
- Black Sharpie marker
- Water colors
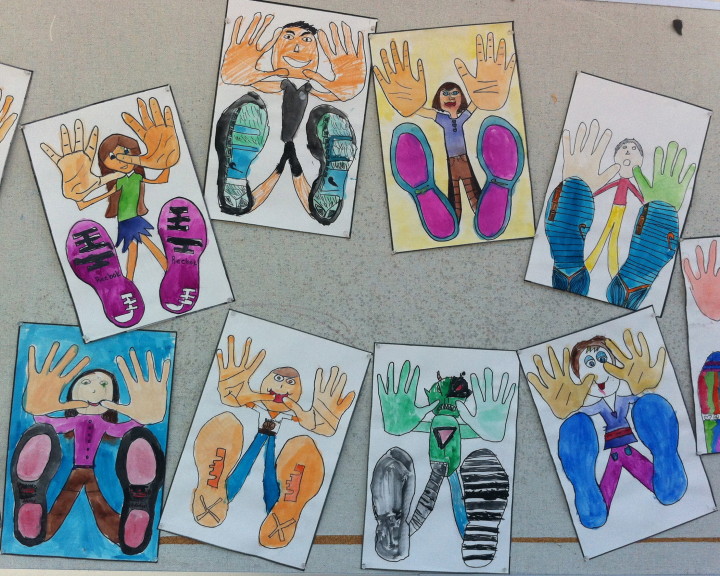
This is a really fun group project. Children get to work together on each others projects! (Great social skills building activity!)
I start by pairing up 2 students together.
Place a large piece of paper on the table in front of each child.
Have the children take turns using a PENCIL to trace each others hands towards the top half of the paper. (Works on tracing skills)
You can then put the paper on the floor and have them trace each others feet (with shoes on) at the bottom half of the page.
I like to then use a black marker and go over the traces to make sure they look ok and have children erase the pencil marks. (Erasing is a great way to strengthen little fingers and teach graded finger control, you have to erase firmly but gently otherwise you can tear or crumple paper)
Each child then adds a face and body to the hands/feet.
I like to have children use watercolors to paint their drawings. Kids LOOOOVE the final product!!!!
2. Pollock-inspired Drip Painting!
You Will Need:
- Large black construction paper
- Acrylic Paints
- Paintbrush
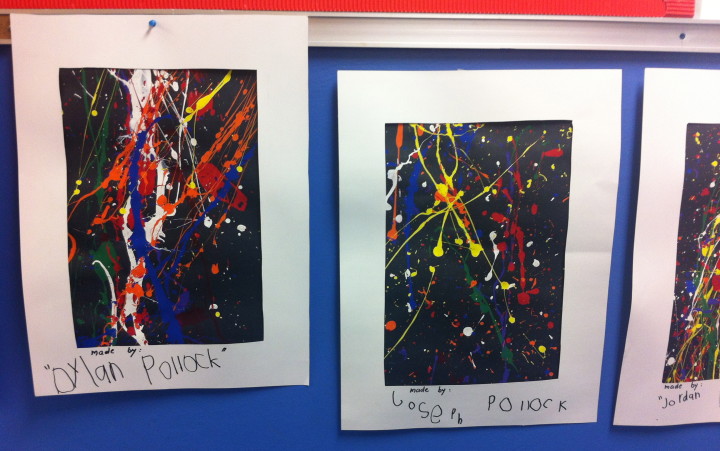
Based on Jackson Pollock’s unique style of drip painting, the kids explored paint in a whole new, liberating way!
This is a wonderful sensory activity. It does get messy so be ready!
Do this activity outdoors.
Place black or white pieces of paper on the ground.
Provide kids with acrilyc paints (water them down a little to syrup consistency if needed)
Give each child a paint brush that they dip in the paint and splash away!!!! Let the fun begin!
By framing these paintings, they make such a great art piece to expose!
I love this activity because it’s great for children with tactile sensitivities (those that don’t like to get dirty) and there’s no right or wrong. No “rules” to follow so this is great for all levels.
We have an Art Exposition at Social Mind Center where all children get a chance to expose their work of art. The Pollock Paintings allow children with lower skills to participate in these Expos.
3. Cloud Painting!
You Will Need:
- White paper
- Shaving cream
- Food coloring
- Paintbrush (or any thin stick)
- Wide popsicle stick
This is a wonderful multi-step sensory activity for kids of all abilities.
Begin by having children spread shaving cream on the table (keep enough thickness)
Squeeze drops of food coloring across the shaving cream.
Use a paintbrush or stick to drag the food coloring across the shaving cream (do not mix all colors together they will become a brown uniform color, we want to see the separation of colors)
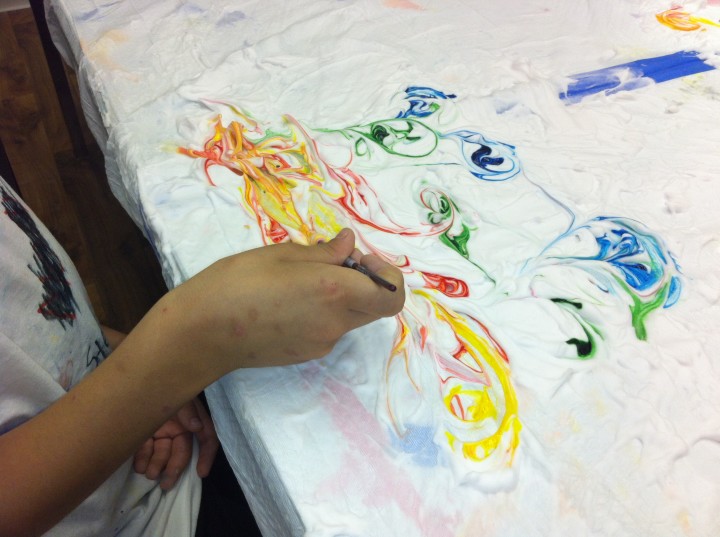
Place a white sheet of paper over the shaving cream and press sown firmly
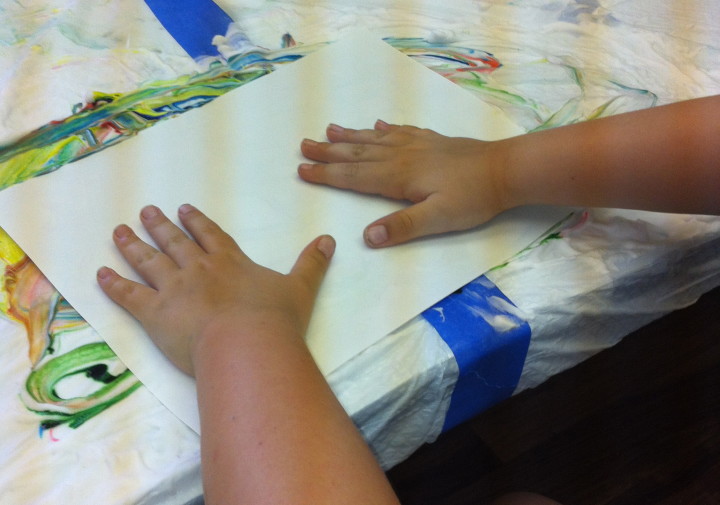
Use the side of a wide popsicle stick to remove by scraping all shaving cream from the paper.
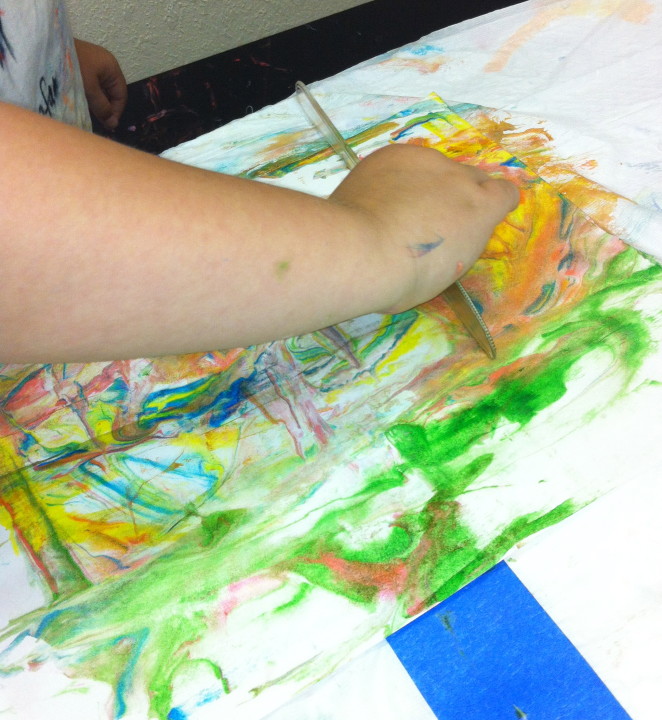
This creates your final product! A beautiful rainbow colored paper!
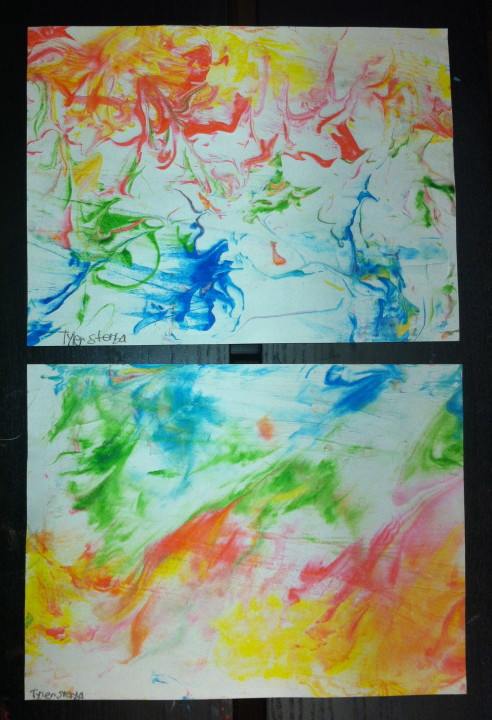
Note: we used a second piece of paper across the shaving cream a second time and it created a similar but lighter masterpiece!
4. Modern Mosaics
You Will Need:
- Black construction paper and another two of contrasting color
- Washi tape of various colors
- Glue and scissors
This is a great activity to teach cutting skills especially to little ones. The idea here is to cut without following any lines so this makes it easy at various levels.
Begin with a blank piece of black construction paper.
Have children stick tape of various colors to cover the black paper.
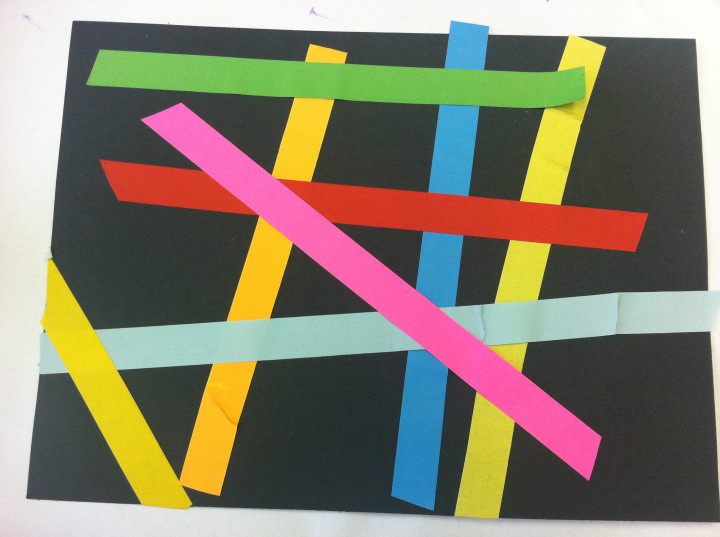
Children then cut this into small pieces (to resemble broken glass)
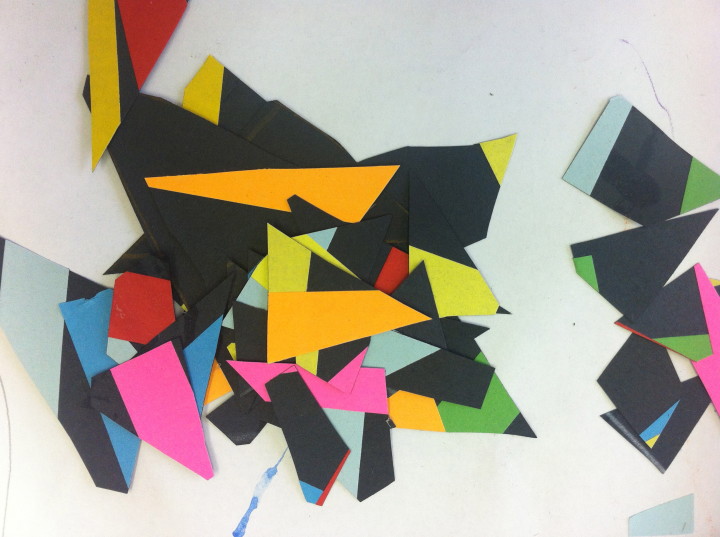
Here we decided to stick the mosaic pieces on each child’s first letter of their name.
I drew the letter (in reverse) on the back of a piece of blue construction paper and roughly cut around the letter, leaving a 1 inch edge.
Flip over the paper (the letter will be on the back of the construction paper) and ask children to glue pieces of mosaics to cover the entire cut out.
Once dry, flip the paper over and now cut out the letter on the lines. When you flip back, you will have a perfect letter with clean edges.
We stuck the letters on a different color construction paper and added a border with washi tape.
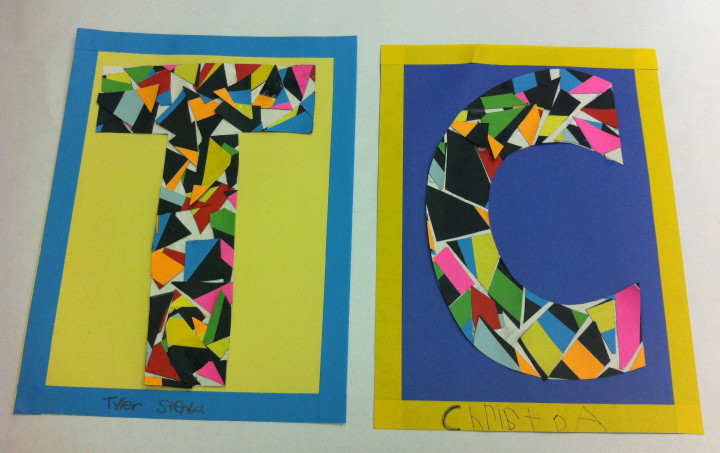
So easy and so pretty!


2 thoughts on “4 Really Cool Art Projects to do with Kids of ALL Skill Levels”
the falling project is so cool i did it in an art class so much fun
Yay! I love it! How did it go?